


Introduction

Lets start with a quick recap on what the chatbot is. Though you might have already known what it basically means.
Chatbots are software applications that simulate a conversation with a user. They automate interactions with users, and can be used to provide information, answer questions, and perform tasks. Chat-bots are often used in customer service, sales, and marketing.
Sarufi platform is one of the platform that facilitates building of chatbot aiming at abstracting all the complexity. Sarufi is built by Neurotech
It is built with easy of use to integrate african languages such as Swahili. All training stuffs is done by Sarufi team, while you can focus on production ready chabot
In this article, I will build the chatbot using Python SDK.
Getting Hands on work
Installing necessary packages
Its good idea to work in the virtual environment as it is very important. You can read A Guide to Python’s Virtual Environments to get a good idea of it.
After creating the venv, i activate it in order to install sarufi.
python -m venv Bots
source Bots/bin/activate
pip install --upgrade sarufi
Creating the bot
In order to create chatbot using Sarufi, you will need authentication the is provided by signing up for Beta program.
In the active environment Bots. Type python or python3 depending on your system.
Username and password will be provided after signing up for beta program.
>>>from sarufi import Sarufi
>>>sarufi_bot=Sarufi(username="jovinerobotics@gmail.com",password="xxxxxxx")
After a successful authentication, now it time to create the bot
>>>jbot=sarufi_bot.create_bot(name="JBot Electronics")
Here the bot object is created. when you call jbot, it returns your bot id and name.
Adding Bots description
The bot id is required in order to update the chabot description. simply call jbot
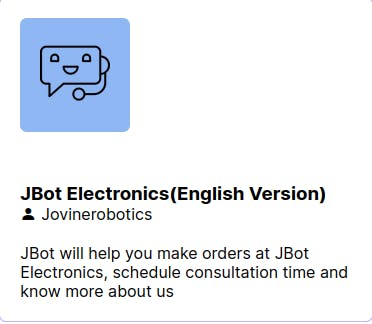
>>>> jbot.update_bot(description="JBot will help you make orders at JBot Electronics, schedule consultation time and know more about us", id=xxx)
This is what it looks like on Sarufi playground
Adding Chatbot intents
Intents are what the user intends or the goal of the user. The bot I am creating is Customer care for Electronics shop
We shall create json file containing our intents. Here is example of the intent saved as intent.json.
{
"greeting":["Hi","hello","hello jbot","good morning","morning jbot","afternoon","good afternoon","hi evening","hello there","hellooo","hey","jbot"],
"schedule":["want consultation time at jbot electronics","consultation","am looking forward for consulatation","consultation time"],
"finished":["thanks","thanks for service","thank you","okay","thats great","nice service"]
}
Adding flow to the chatbot
Another json file is created to add the chatbot flow. the file saved as flow.json.
{
"greeting":{
    "message":["welcome to JBOT electronics, what can i serve you?"],
    "next_state":"end"
},

 "schedule":{
     "message":["Provide the date for consultation"],
     "next_state":"date"
 },
 "date":{
 "message":["provide the time for consultation"],
 "next_state":"contacts"
 },
 "contacts":{
     "message":["provide your contact info (email/phone) to complete scheduling time for comsulation"],
     "next_state":"Email"
 },
  "Email":{
     "message":["we shall reply as soon as possible"],
     "next_state":"end"
 },
 "finished":{
     "message":["We thank you for contacting JBOT electronics, you can communicate via jbotelectronics@gmail.com"],
     "next_state":"end"
 }
}
Finishing the bot
After creating the two files containing intents and flow of the bot. its time to update our bot.
Note: You can provide file path of json files. Bot id is used to update the chatbot intents, flow and description.
In the terminal
>>> jbot.create_from_file(
... id=xxx,
... intents="intents.json",
... flow="flow.json")
Results
Below are some of the conversation after making the chat-bot. You can test my chatbot here and leave some review on it.


Coming next
Integration of Created chatbot with Whatsapp and Telegram.